
Is your computer struggling to run a REAPER session? 😶🌫️
If you hear crackling / popping noise, or things just feel heavy and slow, these are signs that your CPU isn’t working as effective as it can be.
Here are five things you can do to reduce CPU load in REAPER 🔥

📒 Table of content
2. Toggle bypass high-latency plugins
Increase buffer size
When you have high buffer size, you give REAPER more time to process things. This should help relieve a lot of the CPU load.
The downside is that it introduces latency, so it's not great for when you are tracking. If you are tracking you'd want your buffer size as low as it can go before it starts to crap out.
The rule of thumb for block size is:
- Set to high buffer size if you are mixing.
- Set to low buffer size if you are tracking.
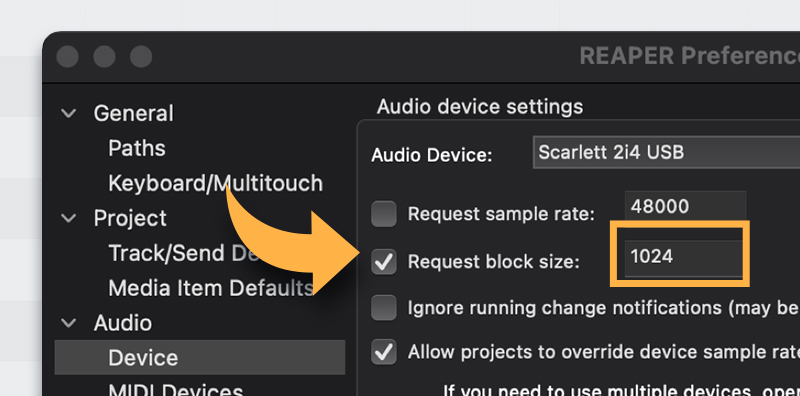
To change the buffer size:
Go to Preferences (Shortcut ctrl/cmd + , ) > Audio > Device > Request Block Size and type 1024. If still struggling, go 2048.
Toggle bypass high-latency plugins
There’s this amazing script that allows you to quickly toggle on/off all of the plugins in your sessions that are introducing latency (limiters, multiband, gates, so on...)
This is super convenient for when you are alternating between mixing and tracking a lot.
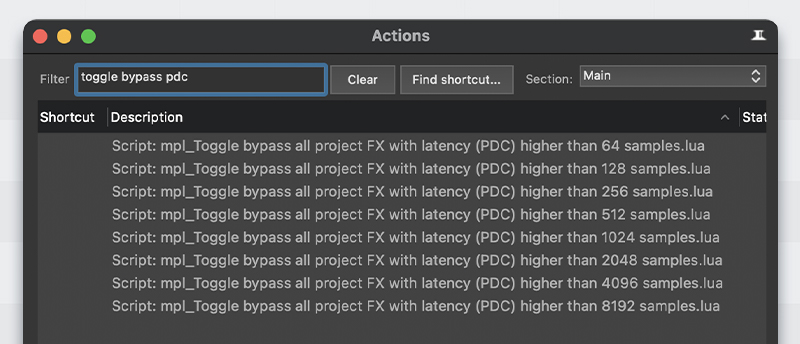
If you have Reapack installed, you should have the following script in your actions menu:
Script: mpl_Toggle bypass all project FX with latency (PDC) higher than 128 samples.lua
Freeze tracks
Track freezing is a feature that renders your track and turns off all of the FX.
This is super useful for when you have tracks with lots of effects like guitars or sound effects.
And the cool thing is that you can revert back any time, adjust and freeze again, effectively relieving a lot of CPU usage 💪
To do this: right click one or more tracks, select Render/Freeze Track > Freeze Tracks

I highly recommend setting up shortcuts to these actions or add them to a toolbar if you find yourself using this a lot:
- Track: Freeze to stereo (render pre-fader, save/remove items and online FX)
- Track: Unfreeze tracks (restore previously saved items and FX)
Use subprojects
If you find yourself working with tons of sound effects and large plugin chains, using subprojects can help you reduce a lot of CPU usage.
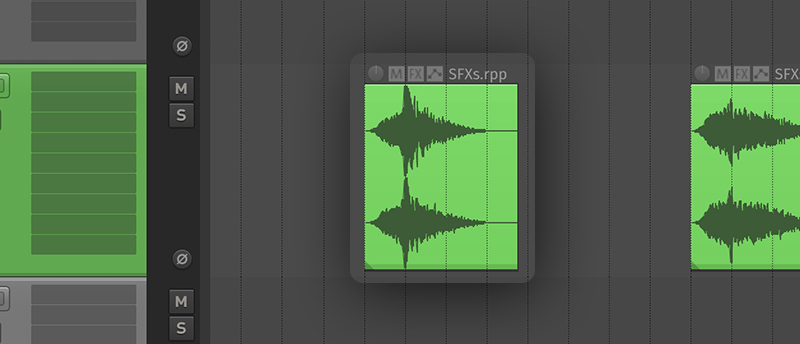
This is one of REAPER’s most powerful features. It allows you to create projects inside your projects like this 👇
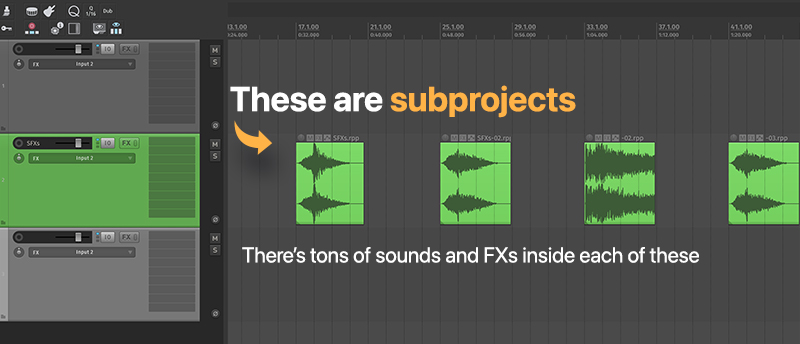
I use this a lot for when I am going crazy with sound design in my sessions. I just grab all of my layers and move them into a subproject.
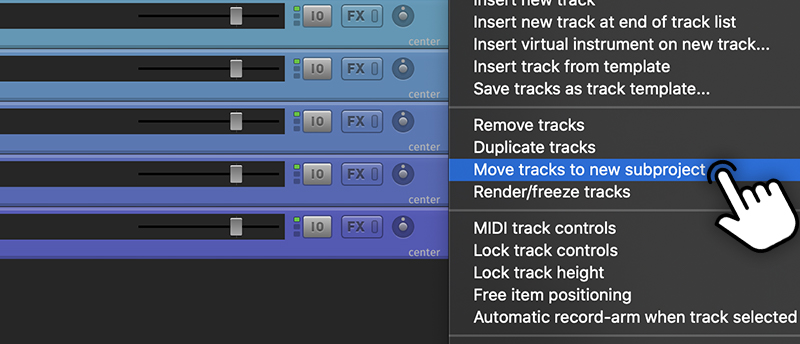
To create a subproject:
Select one or more tracks/items, right click on them and select Move to new subproject.
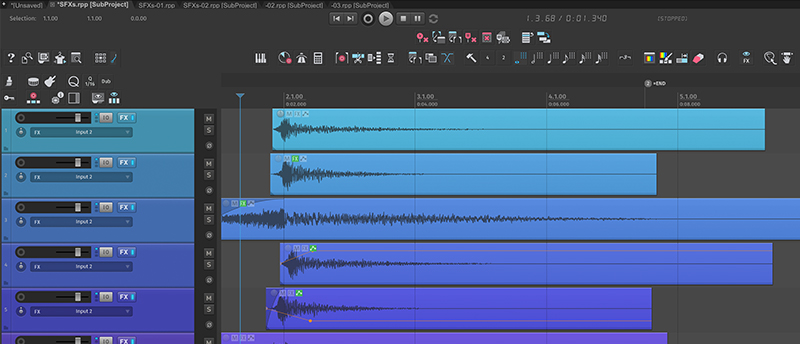
A new project tab will open, this is your subproject. As this happens you will notice that it will render the file and create an item in your main project.
You can double click the subproject item to open it.
In here you can further tweak the sound and add things. When you are done with your tweaks, press ctrl/cmd + S and it will render and update the item in your main project.
I recommend watching this amazing video by Akash Thakkar to see all the things you can do with this! It’s very cool 🙂
Apply FX to items
You can right click any item and select "Apply track/take FX to items as new take".
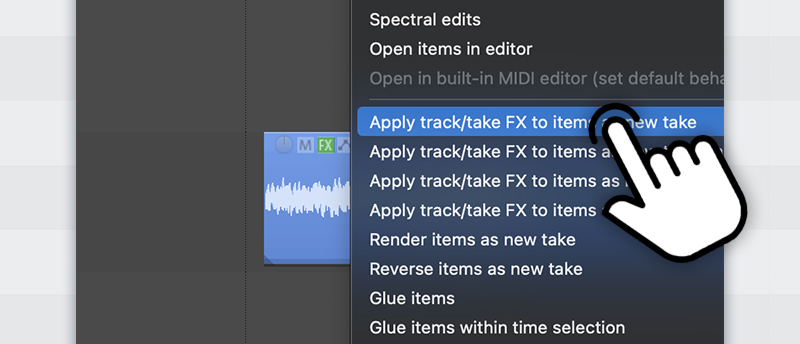
This is perfect for when you are having a small section with tons of plugins and you just wanna render that part.
This isn't destructive either, you will still have the original as a take!
Auto-bypass FX
Since REAPER v6.71, we now have the option to auto-bypass FX when it detects silence, saving you a LOT of CPU! 🤩
To set this up, go to File > Project Settings and enable the option Auto-bypass FX that report tail length or have auto-tail set, threshold:
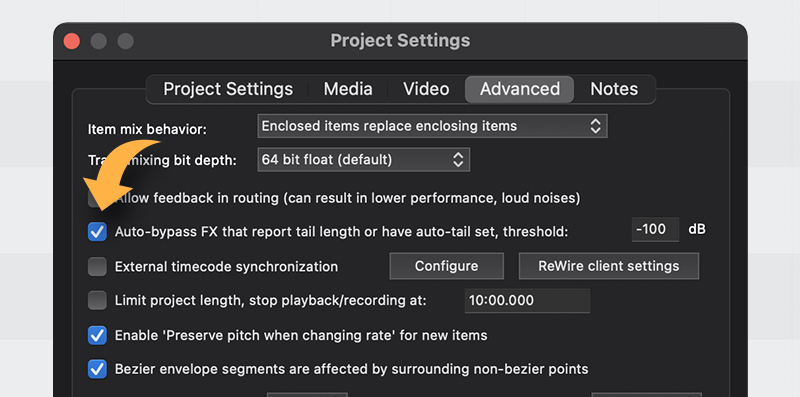
By default it’s -100 dB but you can set your own silence threshold.
How it works
This will only work with plugins that report tail length. All REAPER plugins and JSFX have it.
However, you can force it to automatically detect tail length by per-instance or as default for new instances.
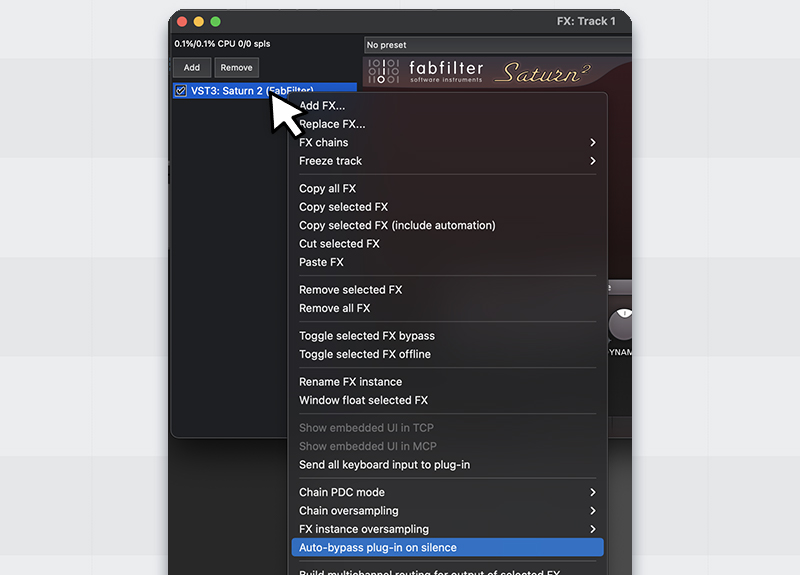
To enable it per instance:
In the track FX window, right click the plugin and select Auto-bypass plugin on silence
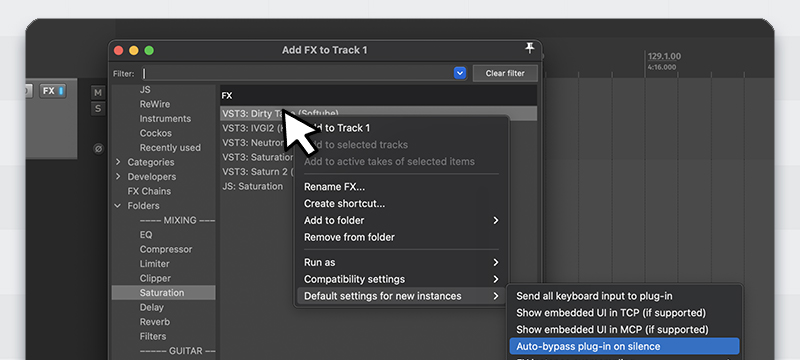
To enable it as default for new instances:
In the FX browser, right click the plugin and select Default settings for new instances > Auto-bypass plugin on silence
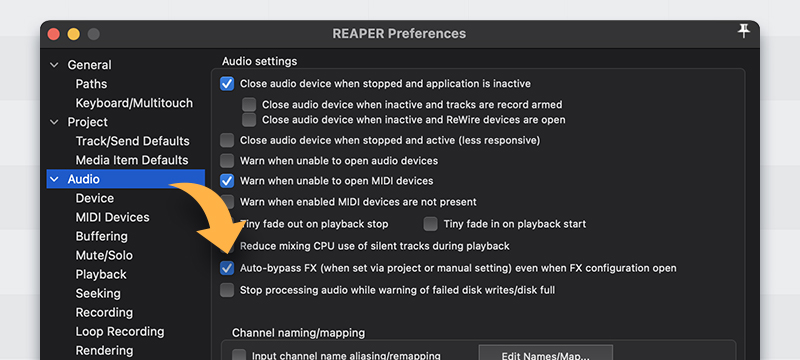
Further improvement
It will still take CPU power when the plugin is open and visible, but you can set it up to work even if the plugin is open via preferences.
To set this up, go to Preferences > Audio and enable Auto-bypass FX even when FX configuration is open
ㅤ
That’s it
I hope this helps alleviate your sessions and have a better time creating cool stuff in REAPER 💙
ㅤ


