
Colored Toolbar Icons for REAPER
I tweaked all REAPER 6 toolbar icons into 12 different color themes you can pick. You also get 6 different border styles to pick from.
Enter $0 to get it for free. If you found this valuable, please donate.
Donations help keep this page running and give me more time to create even more awesome resources like this! 💙
You will get:
Ingresa $0 para obtenerlo gratis. Si encontraste esto valioso, por favor dona.
Las donaciones ayudan a mantener esta página funcionando y me dan más tiempo para crear aún más recursos impresionantes como este! 💙
Recibirás:
- 12 color themed REAPER 6 icons
- 6 border styles + inverted variations
- 12 default modded themes
- PDF with instructions
- 80mb ZIP file (each set is 6mb approx.)
Colored Toolbar Icons for REAPER
You will get:
- 12 color themed REAPER 6 icons
- 6 border styles + inverted variations
- 12 default modded themes
- PDF with instructions
- 80mb ZIP file (each set is 6mb approx.)

Overview
I find the toolbar icons in REAPER 6 to be too dim and lacking contrast with the rest of the interface. I am also not into the lack of borders, as nothing looks like buttons anymore.
So I edited all of the default icons in REAPER 6 to increase contrast and added borders like this:

I also took a bit of creative liberty and changed all accent colors to create 12 different color themes so you can pick your favorite! 🥰
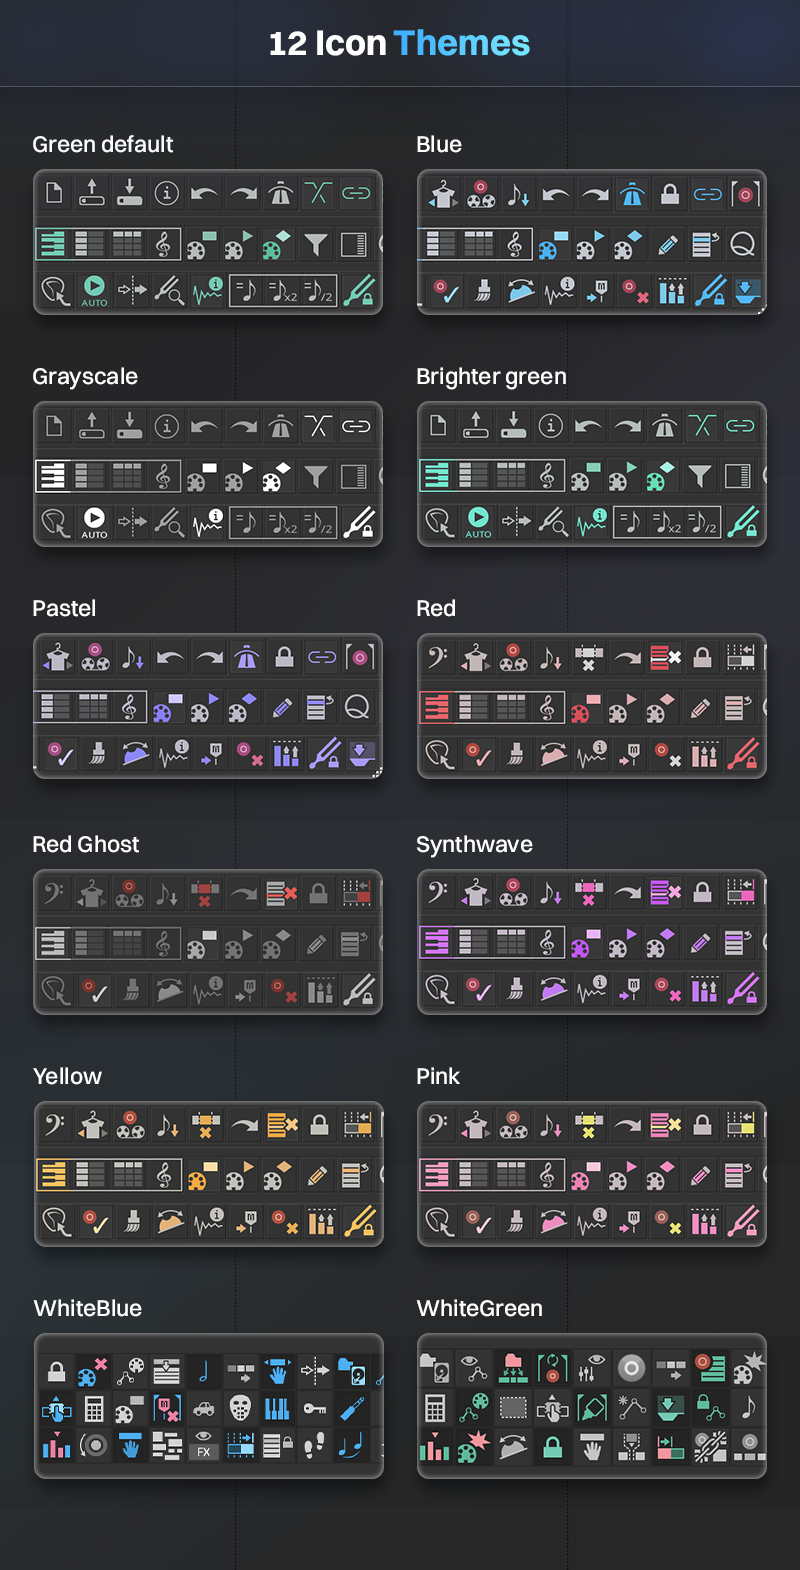
On top of that, I added 6 different borders you can choose from as well. All these have slight variations of style and contrast.
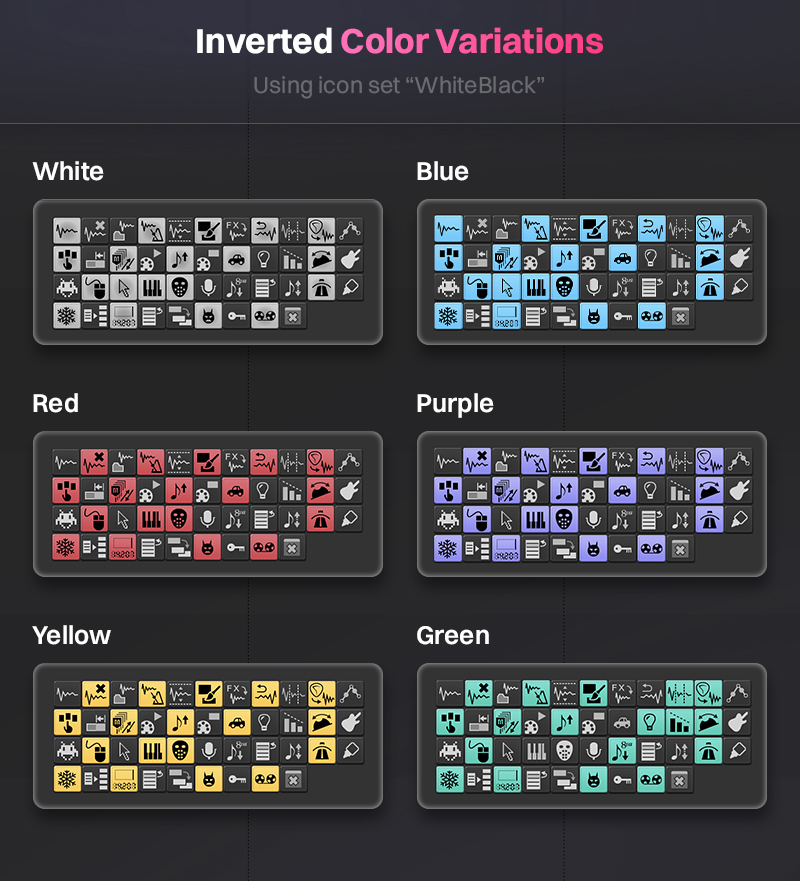
And if you prefer your buttons to be inverted when ON, I've got you covered! I included inverted variations where you can choose from six different highlight colors.
In short, you get 12 sets of color-themed REAPER icons, plus 6 borders (and their inverted variations) that you can use with ANY REAPER theme.
I will now go over how to import these icons and how to make ANY REAPER 6 theme have toolbar borders. It’s pretty simple!
Instructions
Btw, if you wish to skip all these steps, I included a folder with REAPER 6 themes with all the different sets of icons so you can just load that.
But if you want more flexibility and understanding how this works, I recommend keep reading 💪
The benefits of setting it up manually are that you can load multiple icon sets and pick your own border style. You can also use any other theme and still keep your icons!
I made a video installing these in the case you want to follow along! 👇
How to import toolbar icons in REAPER
Once you download the toolbar icons and you choose your favorite folder, here’s what you do:
- In REAPER, go to Options > Show REAPER resource path in explorer/finder...
- In your REAPER Folder, go to Data > Toolbar Icons. This is where you will drop the contents of your favorite folder of toolbar icons.

- Once the icons are imported, you can close and open REAPER and all toolbar icons should be ready to be used.
Setting up your custom icons
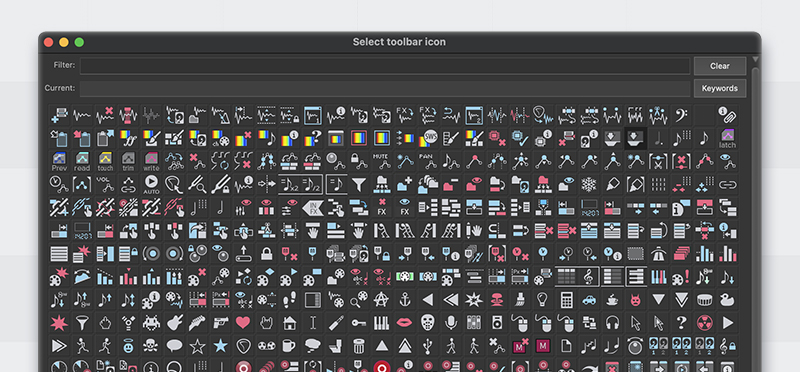
To change the icons in your toolbars, right click on an empty field of the toolbar and click on “Customize toolbar”.
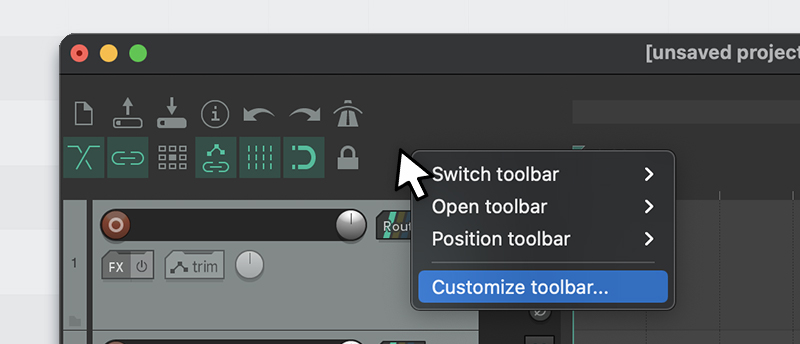
In here you can choose the action and click on “Icon… > Change Icon” at the bottom left of the window. All of your new icons should appear here, and you can use the filter to search for specific ones.

💡TIP: to only see the colored icons is to type the name of your theme into the filter. So for example if I wanted to search for grid icon, i’d type: “blue grid”.
You will notice that your icons still don’t have a border, though. I will show you how to set this up next!
How to add toolbar borders to any REAPER 6 theme
In your downloaded file, there’s a folder called “Borders”. In here you can choose your favorite style of borders. I included an image preview of how they all look. I personally love the look of “Rubber-Dark”, I feel like it has a nice contrast between on and off states.
Once you picked your favorite style, we need to move the content of the folder to the theme we want to tweak.
You will notice that there’s three images called “toolbar_blank.png”. By importing these files inside a REAPER 6 theme, we will be able to use this image as the background of all of our toolbar icons.
For this example, I am gonna pick as my favorite border “Rubber-dark” and I am going to implement this into “Smooth 6” theme.
And for that, we need to unpack the theme, import these toolbar_blank.png files, and repack the theme. I will walk you through how to do that now. No worries it’s pretty simple ✨
Unzipping the theme
- In REAPER, go to Options > Show REAPER Resource Path.
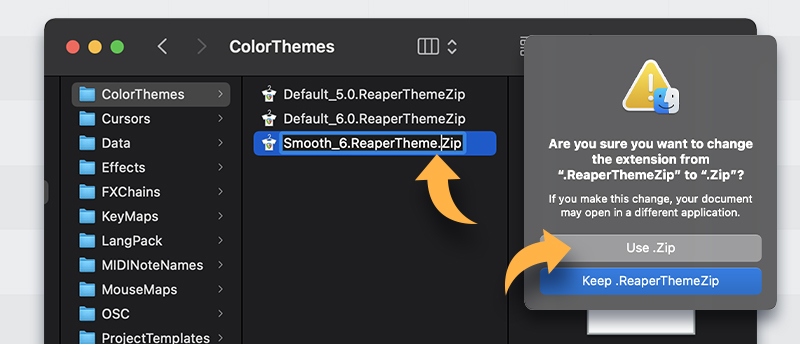
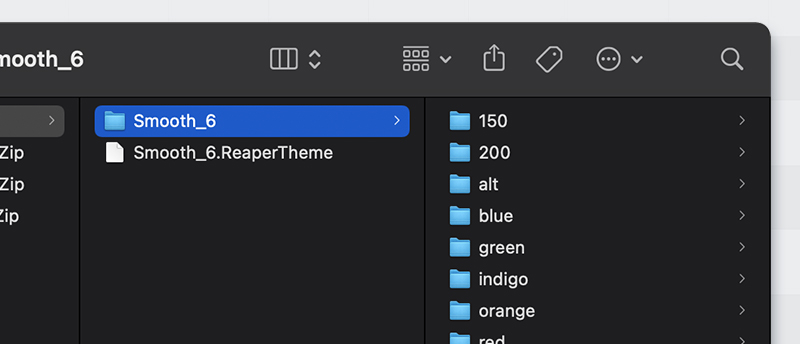
- Go to “ColorThemes” folder and find the theme you wanna tweak.In this case we will tweak the default theme: Smooth 6.ReaperThemeZip.
- To unpack this theme, rename the file’s extension and place a dot before the zip like this: “.ReaperTheme.Zip”. When prompted, choose ".Zip."
- Uncompress it, and you should end up with two files that look like this:
Importing the toolbar_blank files
Now that the theme is unpacked, we are ready to import the toolbar_blank.png files!
To do so, copy the contents of your favorite borders folder and paste it into the unpacked folder from the theme.

Repacking the theme
Lastly, we will zip back the two files we just unzipped. And name it with the extension “.ReaperThemeZip”

This is now your new modified theme! 🤩
Load this theme and all your custom toolbar icons should have borders now 💙
❓Common questions
What if I change my mind and want to try another border style?
You’d have to repeat the same steps as before where you unpack the theme, load and replace the blank toolbar files and pack it again.
How do I use the inverted variations?
Simple! Find the “WhiteBlack” icon set inside the “Inverted variations” folder and import it into REAPER > Data > ToolbarIcons. Then, set the icons in REAPER like normal (see the question below for a method for batch changing all icon colors).
As for the borders, choose a border style inside the “Inverted variations” folder. I added a preview image of how each of them look.
For example, if you like “Rubber Inverted” in Blue, go to the folder Rubber Inverted > Blue. Then, import the toolbar blank files into the theme following the same steps as above.
I imported the icons and changed the borders, but some icons still show a green background?
This is because the theme references the toolbar icons within the theme, which are the default ones (these have the original border baked in).
For this reason, I recommend to use the custom icons that you placed in "REAPER → Data → ToolbarIcons" for the borders to show up.
For example, if you imported the Default Green icons, you must replace all the default icons with the new ones you imported.
TIP: When selecting a new icon, use the filter to display only the imported icons from the set, such as "RT_DefaultGreen". These should all appear with the new borders.
What if I want to try another icon color set after I manually setup all icons in one color?
This one is tricky because I'd suggest manually replacing all icons again, which would be annoying. However, here's one trick I came up with that you can do.
Let’s say we imported the blue icons. But we now want to use the red icons.
- Just like normal, import all red icons into REAPER > Data > ToolbarIcons folder.
- In the same REAPER folder, find a file called “reaper-menu.ini”. Open this with a text editor.
- Open the “Find and replace…” dialog and in find you’d put the name of the icons you want to replace and replace it with the icons you want to replace with.In this example, search for “Blue” and replace it with “Red”. Hit apply to all.
- Now, next time you open REAPER all your blue icons will turn into the red icons!
That's it! Enjoy ❤️
This was super fun to make! I think toolbar icons can add SO much to themes. It’s such a great improvement to REAPER 6 themes like Smooth 6.
If you have any questions about any of the steps here, I am happy to assist. You can DM me on instagram, discord or email.
If you have a color theme request, please let me know, I can make a part two with more color themes like this! 😊


