
If I could change one thing about REAPER's settings, it would be how it manages files and project folders. It's really messy. 😵💫
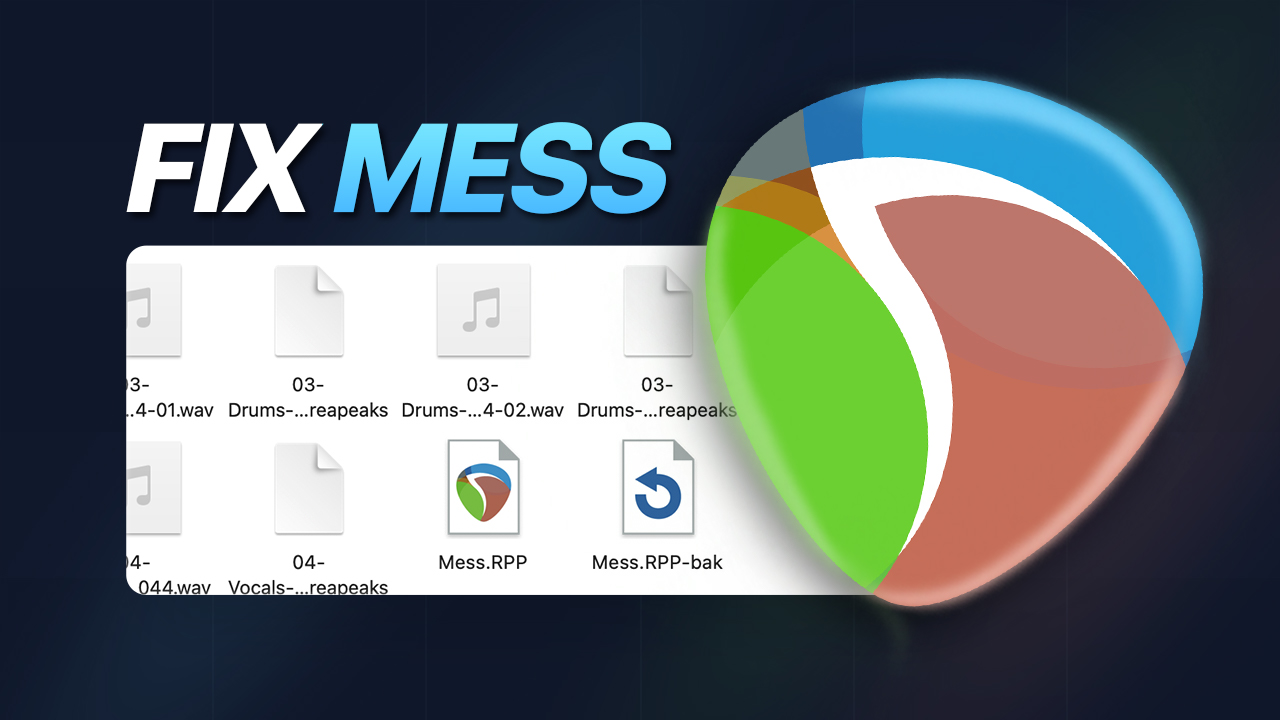
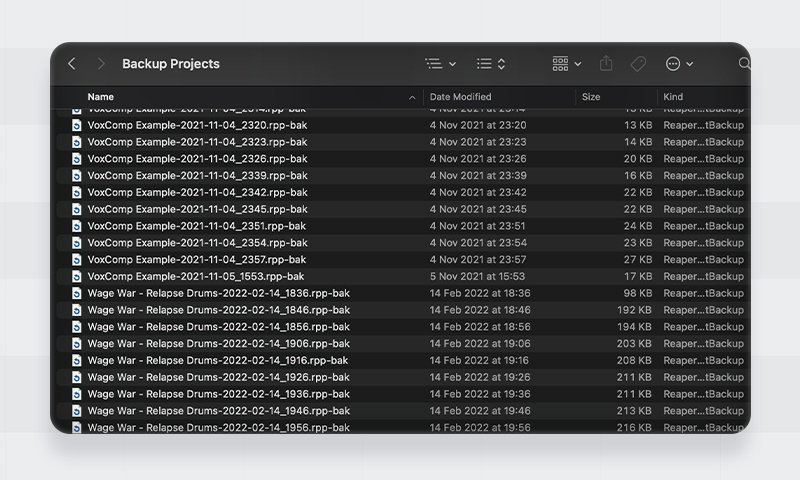
Since REAPER puts all reapeak and audio files next to the project folders, they usually end up looking something like this:

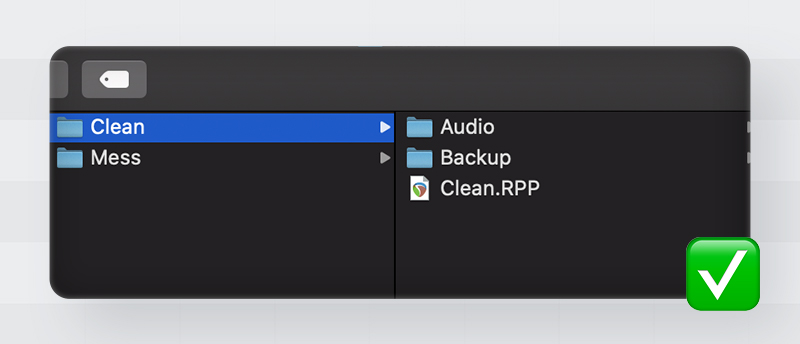
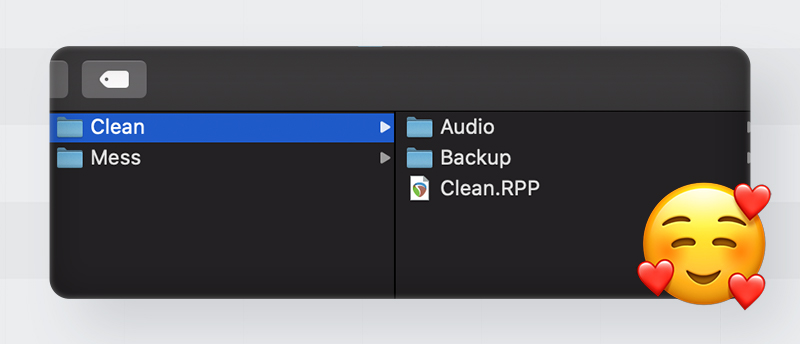
In this quick tutorial I will show you how to get cleaner project folders so it looks nice and neat like this:
We will be creating a dedicated audio folder for each project, set up an alternative path for reapeaks and a life-saving backup folder.
1. Dedicated audio folder
By default, REAPER places all audio and projects next to one another. It is much neater to keep all audio files in one separate folder.
Steps
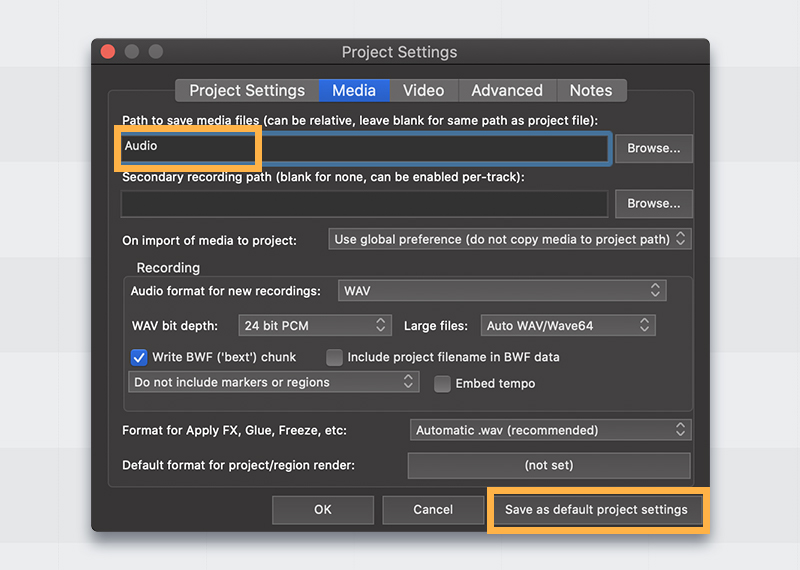
- Go to File → Project Settings… → Media.
- Type ‘Audio’ in the first path.
- Lastly, click ‘Save as default project setting’.
2. Set up path for Reapeaks
If you are new to REAPER, you may be wondering why there are so many reapeak files on your computer…
Reapeaks are small image files generated automatically by REAPER to display waveforms.
It's great, but the reapeak files get put right beside the audio file. So every time you move or make an audio file in REAPER, it puts a reapeak file beside it. This can quickly become a big mess.
It's simple to fix! We can make a folder and put all the reapeaks in it.
Steps
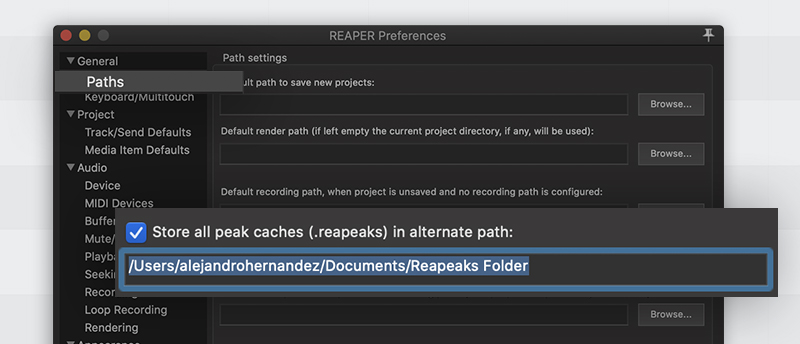
- Go to Preferences → Paths.
- Enable ‘Store all peaks in alternate path’.
- Make a folder somewhere in your computer called ‘Reapeaks’ and set the path to this folder.
3. Back up folder
Alright, now this is a life-saving feature! 🔥
You can set up a backup folder and keep versions of your projects with timestamps. This is very useful when you want to revert to an earlier version.
For example, maybe you deleted a track a few hours ago and you need it back. You can just go to that specific timestamped project, open it and get the track back! 👏
In rare cases, if REAPER crashes, you don't have to worry about losing your progress. All of it is saved in timestamped backups, so you can pick up where you left off. ✨
Setup
- Go to Preferences > Project.
- In the project saving section, check all these boxes and set your backup folder path:

- Done! Every now and then you can go and delete some old backups if you want.
That’s it!
Your project files should now look squeaky clean like this!
Now that you have set up your project folders, you can enjoy a neat and organized workspace with REAPER. You will never have to worry about losing files due to the backup folder, and the reapeak files will be stored in a separate folder.
Enjoy 💙


